| [ | Main Menu | ] |
| [ | Domains | ] |
| [ | Subdomains | ] |
| [ | Web Forward | ] |
| [ | Dynamic DNS | ] |
| [ | IPv6 Reverse | ] |
| [ | Backup DNS | ] |
| [ | Preferences | ] |
| [ | Registry | ] |
| [ | Logout | ] |
For Everybody:
| [ | Home | ] |
| [ | Resources | ] |
| [ | About Us | ] |
| [ | FAQ | ] |
| [ | News | ] |
| [ | DNS Stats | ] |
| [ | AUP/TOS | ] |
| [ | Contact | ] |
| [ | Router Setup Guide | ] |
Automatic Dynamic DNS V2 via your router! Today, almost the most basic router includes a dynamic DNS function. This guide is to help you to use your own dynamic domain name.
For now, we are using the DD-WRT firmware using the Linksys WRT1900ACS router as an example, but the logic is the same. There is a router database on the DD-WRT page, but we are using the latest version that can be found via FTP here: ftp://ftp.dd-wrt.com/betas/, Should you need an older version, please try http://dd-wrt.com. It is easy to find your own router, given it is a WRT router. A word about the update cache: Beware that there is a short (only 2 minute long) frontend cache for repeat updates (> 3 updates) to the same update URL (which mitigates the very large volume of repeated requests to the backend), so when you are setting up a new update client, the safest method for testing updates is to point to an invalid address initially, and let your client solely do the first update to the correct address - this should provide assurances that your configuration is proper. (Otherwise, you can generate a new key for the record, or wait for old caches to expire) Of course, there are different firmwares, built-in, OpenWrt or even LEDE to name a few, but DD-WRT seems to be the easiest. Step 1.
Step 2.You want to setup your domains, like this (domains > add):
Step 3.Once you setup a free DNS domain. You need to add some DNS records, like this (subdomains > add)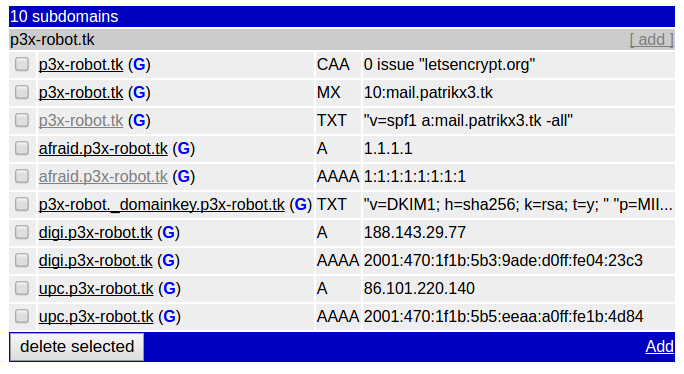
For the example, I am using the afraid.p3x-robot.tk domain and will dynamically update the IPs. Note: In my example I am using both IPv4 and IPv6 as well (dual stacked). The A DNS record is IPv4 set to 1.1.1.1 above, and the AAAA DNS record is set to 1:1:1:1:1:1:1:1, the IPv6 address. From our PC we can see it is functioning as configured within DNS: 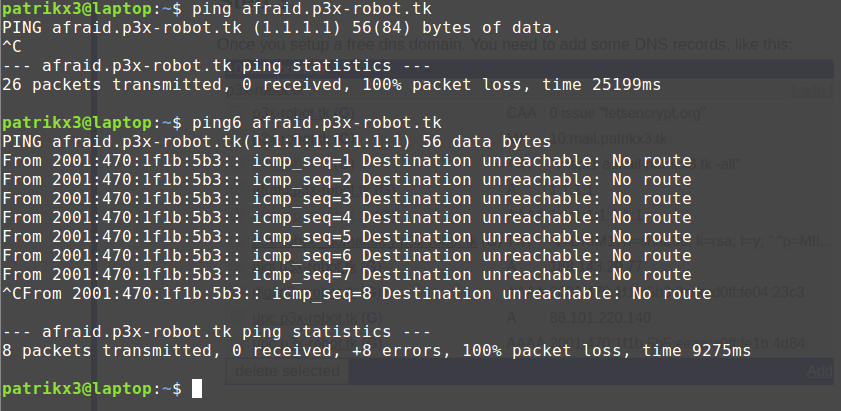
Step 4.So, let's check out the freedns.afraid.org v2 dynamic update interface, it automatically populates based on the contents of my account (subdomains > add), it looks like this:
Just click the and click buttons to enable and generate the update URLs, so the same page now looks like this: 
Repeating this process will generate new update keys for them. Optional Tip: Are you wanting to point many/multiple DNS entries to the same destination, automatically? If so, you can update more then one record with a single update key! To do this, click the middle checkbox to use that update key as a "clone master", and then check the records on the left most box to replicate the selected "clone master" to multiple records, then click activate/apply at the bottom. Step 5.In your router, navigate to (Setup > DDNS)Place the update URL your router's settings, like in the screenshot: 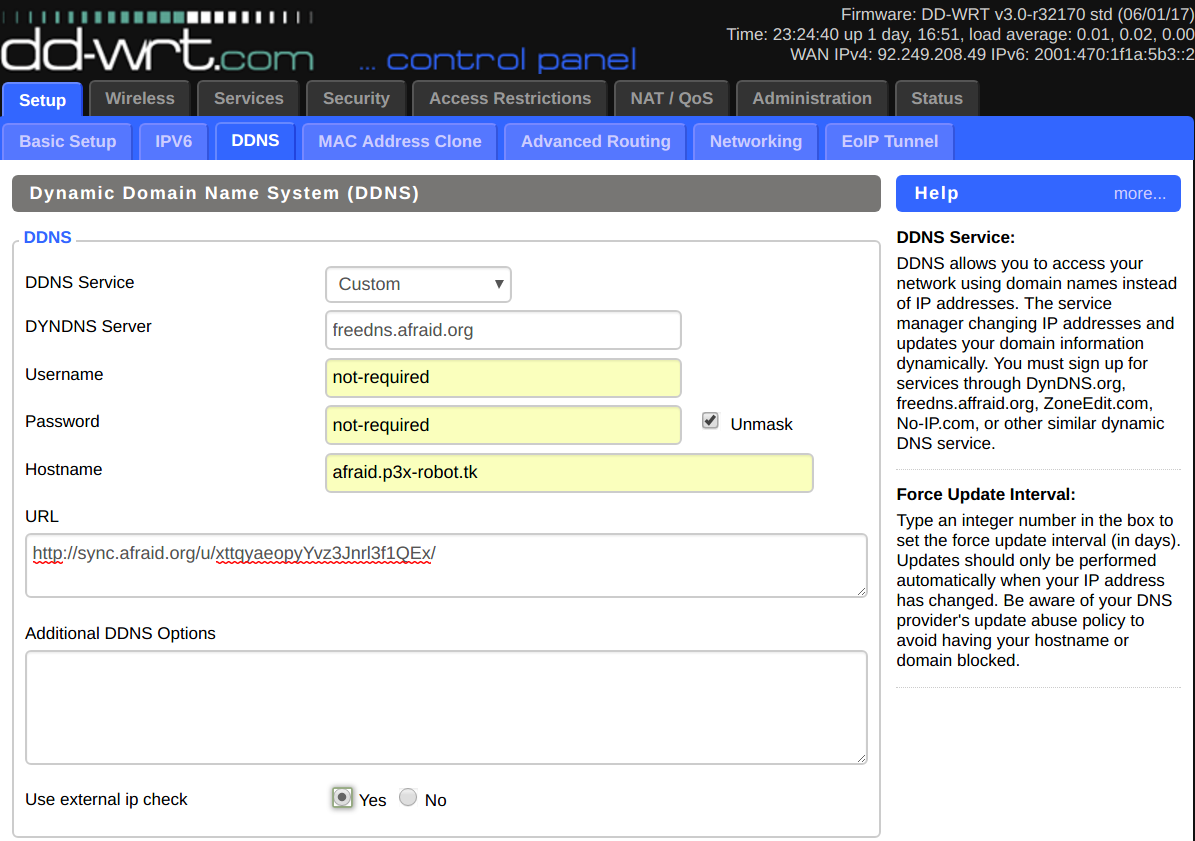
Step 6.Review the bottom of the page: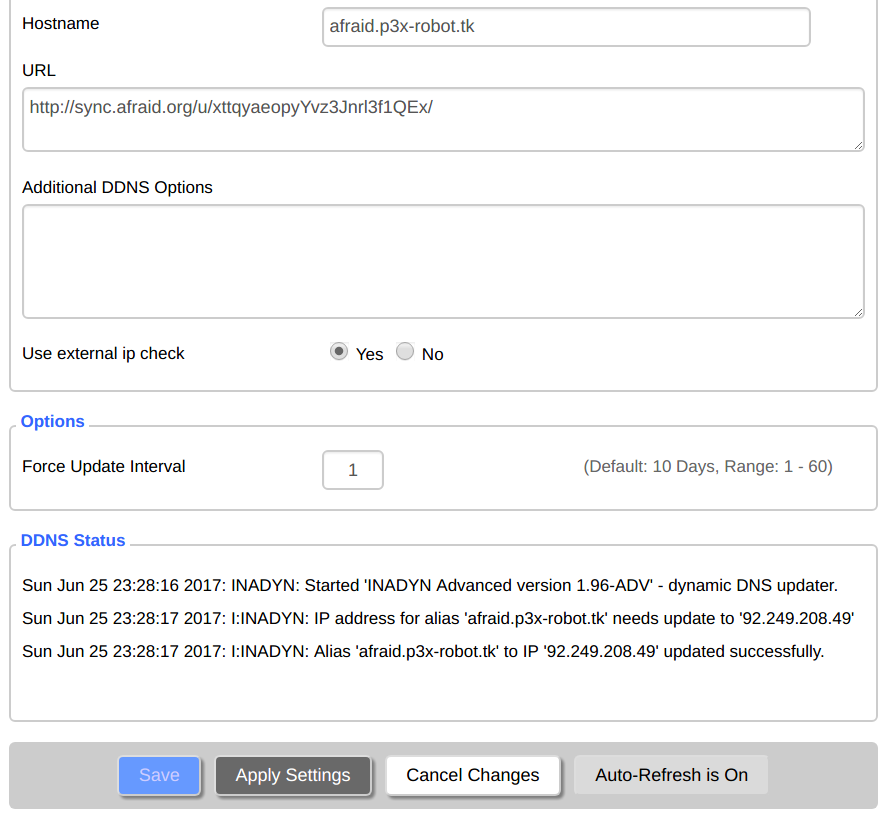
Just click , and after , wait for a bit and you will see above: updated successfully. It works...Step 7 (Optional) - IPv6, and updates via 'cron' instead of 'DDNS'The same logic is the same for IPv6, but for your AAAA records, you get a different URL, like this:http://v6.sync.afraid.org/u/FGpuRPivoSj0fYhMMD9JoquL/ Note the v6 is a native IPv6-only listener operated by freedns.afraid.org, this forces dual-stacked v4/v6 clients to communicate over v6. Not every router understands IPv6 out of the box, IPv6 get their own IPv6 address (because every hardware in the world gets a unique address), so DDNS is not really needed, but with some ISPs, you still get a dynamic IPv6 address. This is tricky though, you will need to use IPTABLES or something else, but it can be done, you can use the IPv6 URL given to you. You could use something like: http://v6.sync.afraid.org/u/FGpuRPivoSj0fYhMMD9JoquL/?ip=2001:470:1f1b:5b3:9ade:d0ff:fe04:23c3 As you can see, it is not a DDNS solution. Probably, cron can be your good friend (the option of using multiple records A as well AAAA and multiple dynamic DNS names)... Right now, even DDNS does not support IPv6 out of the box. It needs a few scripts. DDWRT works with cron out of the box, so you can use the (freedns > v2 update interface > Generate a 'cron script'), then paste that into your router's (Administration > Management > Cron) section, so it looks something like this: 

Step 8.As freedns.afraid.org shows once the update interval passes, your domain name is live getting the correct IP automatically:
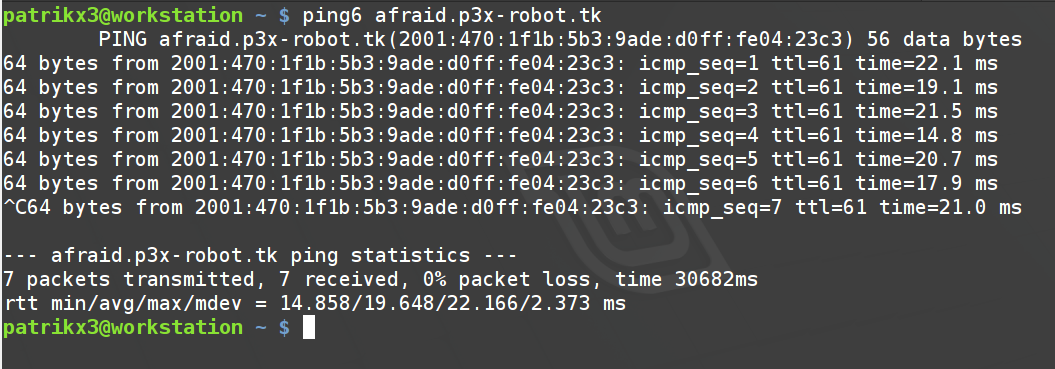
Step 9.Try a ping:
|
| Members: | 4,486,040 |
| Premium: | 5,309 |
| Records: | 12,863,325 |
| Zones: | 1,250,294 |
|
+50 subdomains +3 stealth flags Wildcard DNS Just $5 a month! Go premium today! |
|

|
